Runner in GitLab allows you to automate routine tasks when updating projects in a repository. In our example, we will consider a situation where we use a GitLab server to store a project and 5 web servers where changes should go after a git push. We will set up our CI/CD to sync files with rsyncd. It is assumed that we already have GitLab installed on Linux, otherwise, use the instructions for Ubuntu.
Installing and registering Runner
Runner is a standalone application that runs to run CI/CD jobs. It can be installed on any computer running any popular operating system (Linux, Windows, BSD, Mac OS, and so on). Various installation options are also available – from a repository, downloading a binary, or running as an application in Docker or a Kubernetes cluster. We will install from the Linux repository on the same server where our GitLab is running.
By default, Runner is not installed with GitLab. To install it, you must first configure the repository – our steps depend on the system you are using.
Configure the repository:
Debian / Ubuntu:
curl -L "https://packages.gitlab.com/install/repositories/runner/gitlab-runner/script.deb.sh" | sudo bashRed Hat / CentOS:
curl -L "https://packages.gitlab.com/install/repositories/runner/gitlab-runner/script.rpm.sh" | sudo bashInstall Gitlab Runner:
After configuration the repository, we perform the installation. The command also depends on the type of operating system.
Debian / Ubuntu:
apt-get install gitlab-runnerRed Hat / CentOS:
yum install gitlab-runnerAfter installing gitlab-runner, we enable autostart of the service and start it:
systemctl enable gitlab-runner --nowRegistration Gitlab Runner
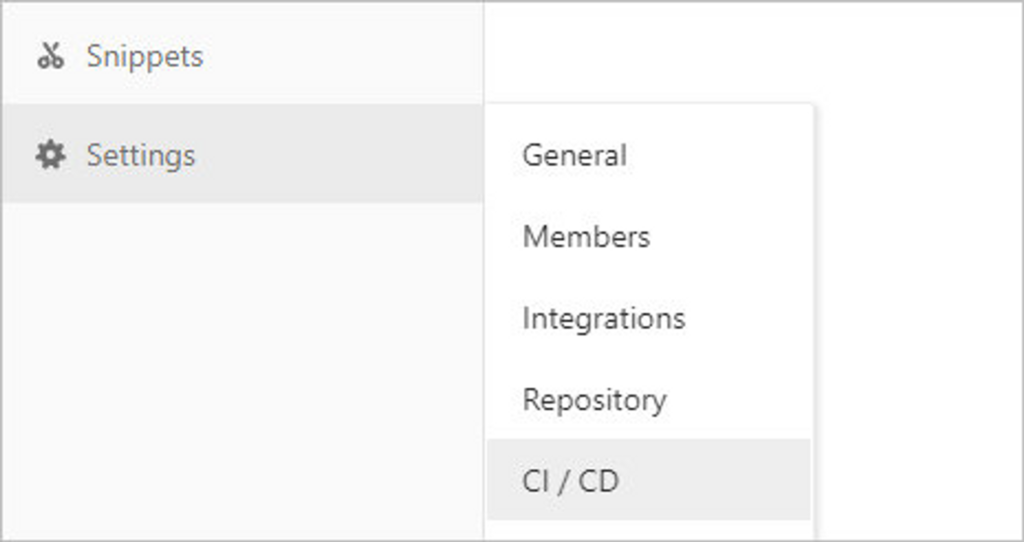
For the Runner to work correctly, it needs to be linked to our project in GitLab. To do this, first go to the portal of the latter – go to the project page – in the menu on the left, select Settings – CI / CD:

Find the Runners section:

To the right of the name, click on Expand:

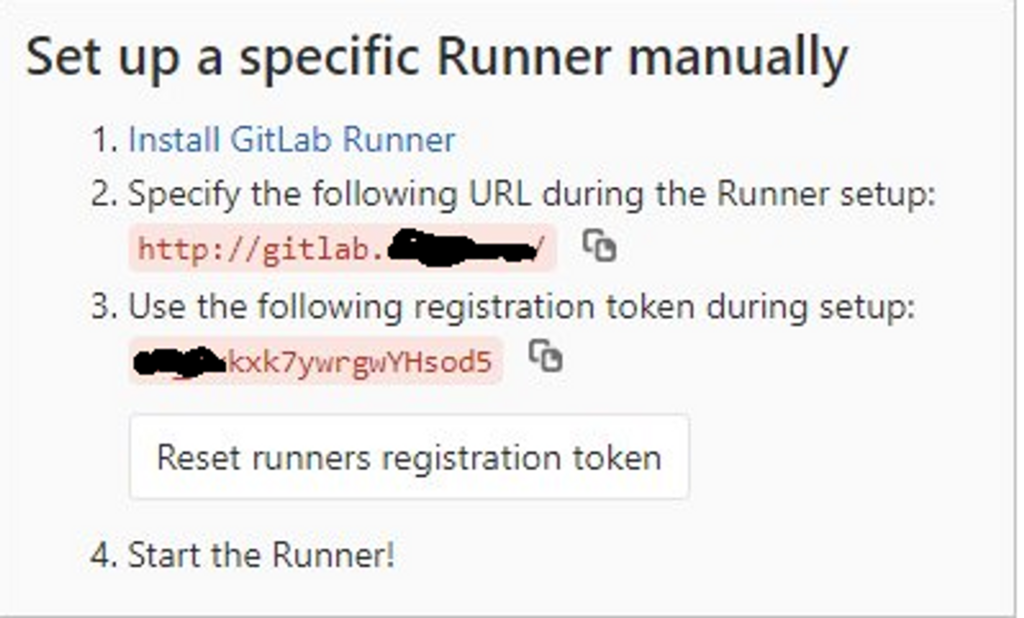
We find the parameters for registering a new runner:

and leave the page open – you will need it in the next step.
On the command line of our GitLab server, enter:
gitlab-runner registerThe system will interactively request data for registration – enter them:
Enter the GitLab instance URL (for example, https://gitlab.com/):
https://gitlab.example.com/
Enter the registration token:
aB_Kvkxk7ywrgwYHsod5
Enter a description for the runner:
[git-server.example.com]: EXAMPLE Metrics API
Enter tags for the runner (comma-separated):
example, metrics, api
Registering runner... succeeded                     runner=zX_Kvkxk
Enter an executor: parallels, virtualbox, docker+machine, docker-ssh+machine, kubernetes, custom, docker, docker-ssh, shell, ssh:
shell
At the end we should see:
Runner registered successfully. Feel free to start it, but if it’s running already the config should be automatically reloaded!
Creation of CI/CD for the project
At the initial stage, we will create a simple script that will simply output the path to the directory on the server where the project is located.
Go to GitLab on the project page and click on Set up CI/CD:

… or you can simply create a file in the root of the project:
nano .gitlab-ci.ymlSet the content of our script:
default:
  tags:
    - example

stages:
  - test

test:
  stage: test
  script: echo $CI_PROJECT_DIR/
After saving the file, we wait a few seconds and restart the page – we should see the successful result of the CI / CD script:

Click on the green checkmark icon and in the page that opens, click on our only stage:

We need to see the progress of the task and the result of its work.
CI/CD created.